
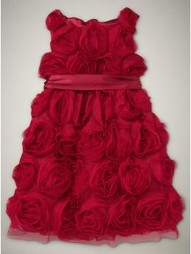

I spotted these cute Rosette numbers at GAP a few weeks ago and instantly fell in love. I knew I could never afford the $70.00 price tag for the dress or even the $40.00 for the skirt…so of course I created my own version! I have to say that I love them!

Could these outfits be any cuter? It helps that my baby girls are so cute too… but I know I am biased! ;P Other than the fact that the rosettes take a while to make when you are covering a dress etc. This was so easy to make AND cheap ( 7 dollars for all 3)… maybe one of my cheapest creations to date!!!
Rosette Vest, Dress and Skirt Tutorial
What you will need:
1-2 yards Jersey Fabric in color of choice (I used 2 XL T-shirts for all three)
1 yard of Tulle in color of choice per 10 Rosettes (I used about 7 yards for all three)
thread in EXACT color of Tulle
1 spool ribbon (optional)
Let’s start with the Rosettes…
Before you begin… Thread and knot your needle cause you will need it at the end and you won’t have 2 hands available by then!!!
Cut your tulle into 72 inch long and 4 inch wide strips. Each strip will become a rosette so make as many as you want rosettes.

Take your first strip and tie a knot in the end of it.
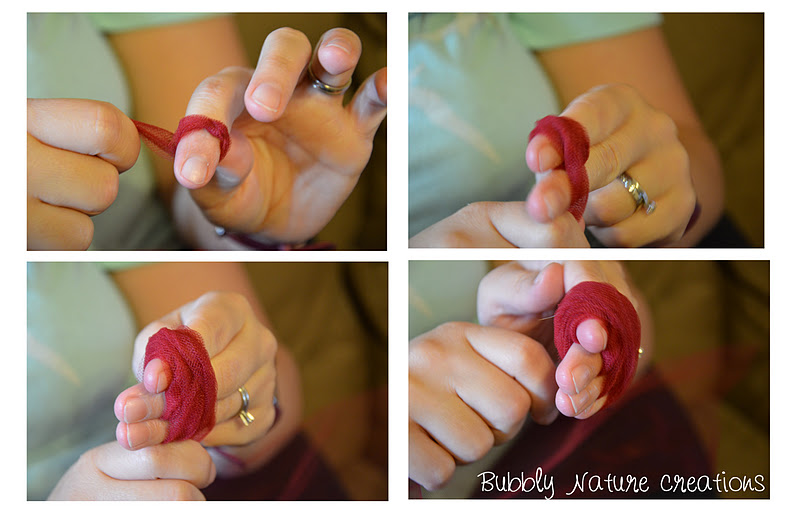
Wrap the knotted end around your pointer finger 2 times while twisting slightly as you wrap (twisting helps keep it thin)… then add your middle finger and wrap the tulle around both of them 2 more times… repeat with the third and forth fingers like the pic above… when you get to the fourth finger wrap and twist until you get to the end.

Once you are at the end of the rosette take your already threaded needle (you did thread it right?) and sew the loose end to the rosette. Carefully lay your finished rosette in a place that won’t be bothered because it could fall apart before you get it onto the fabric! Now make 50 bajillion more of these! LOL Easy… but time consuming!!!
Now on to the dress, vest and skirt…
I simply rummaged the girls’ clothes and found all three to make patterns of. To make your own patterns just simply find what you want to make that you already have and lay it on top of your fabric. trace your dress (or vest, skirt etc.) 1/4 inch bigger around to allow for the seam. Now these were simple skirts etc. I wouldn’t try this method on anything that has lots of funky curves or anything! Here are some pics of mine in progress…

For the dress above I just traced the dress and cut out 2 pieces the same size and sewed them up the sides and around the arms…

For the vest I traced the general size that fit my daughter and eyeballed the front 2 pieces. I sewed it up on the sides and top and made sure to allow for the arms.

For the skirt I traced another skirt about 1/4 inches bigger around… This skirt was a simple A-line that I just sewed up the sides!
To apply the rosettes…
To apply the rosettes you will need to hand sew them onto the fabric. I laid all the rosettes out onto the skirt (or dress/ vest) to see where I liked them best then carefully took them off and started sewing them one by one by hand. Make sure that you sew the whole rosette and make sure the thread goes through all the layers so that you won’t have any loose layers on the rosette. This also will take a long time!!!
At this point spending the $70.00 may actually seem reasonable…LOL… but wait until the end because it is so worth it!!!

CUTE

CUTE

CUTE!!!
Happy Creating!!!
big tits pics
Thursday 6th of December 2018
It's remarkable in favor of me to have a website, which is valuable in favor of my know-how. thanks admin
Mukta
Friday 28th of June 2013
Ur awesome really .. Really needed this one thanx ..
Mama G
Wednesday 21st of November 2012
Very cute!! Will the rosettes stand up to washing?? Just want to be forewarned....
Rachel
Wednesday 21st of November 2012
I washed ours a few times, but I wouldn't expect it to last a really long time.
Jan
Saturday 23rd of June 2012
When I first saw this on pinterest, I thought the rosettes were from bias cut chiffon, but I think the tulle would be so much easier! Thanks so much for sharing. The outfits sure turned out darling!
Agy
Monday 5th of December 2011
Oh so cute!! The rosettes are a lovely idea :-)