
Have you ever thought of something and then found out that every other crafter on the web has also thought about making that same thing…. Well the other day when we were at Target I found some super cute Christmas place-mats that just happened to match some pillows that I got last year after Christmas. I was so excited because as I was looking them over I noticed that the way these fabric place-mats were sewn that it would be SO easy to make into a pillow! Of course I picked up two of them since they were only $3.00 each on sale and went home to make my project.
As with any project I do I always check to see who else is doing it too and of course I found several tutorials on the same thing!!!! LOL Oh well… I worked hard on this and although it looks like a copy of all the others… just in case you haven’t seen it yet here is the
Placemat Pillow tutorial!
What you will need:
placemats that are sewn with two pieces of fabric (make sure the fabric from the backside is not glued down to the front) most of the Target brand I saw is! $2- $4.00 each
old pillow or poly-fil (I used an old pillow and sacrificed it for this!) free to $2.99
fabric glue or needle and thread (your choice no sew or not!)
seam ripper (can be found in the sewing section of most fabric/ hobby stores)
2 pillows cost me only $6.00 since the placemats I got from Target were on sale!!!
Directions:
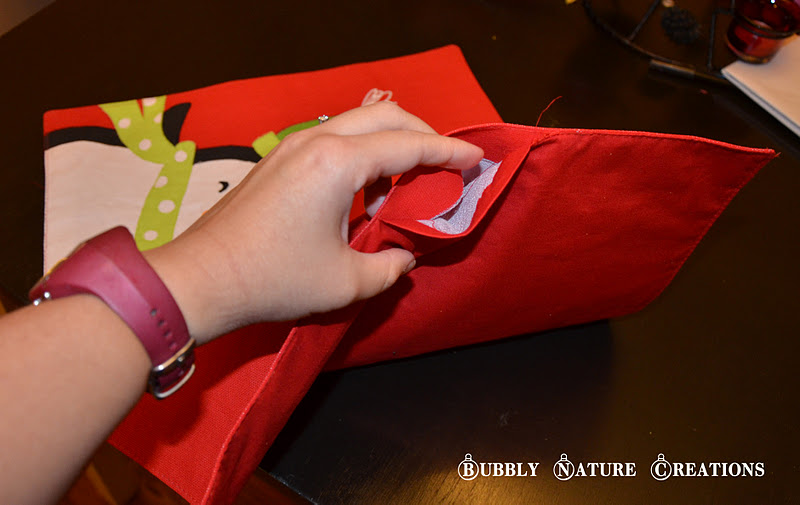
Here is an example of what the placemat looks like from the back… it needs to be 2 peices of fabric sewn together that can be separated (some placemats are glued together which won’t work!).

Isn’t this little guy cute?

Take your seam ripper and rip the seam out of the side of the place mat just large enough to fit your arm through. Then start stuffing and stuffing!!! Make sure to push the stuffing into the corners to puff them out… you want to put in enough to make it fluffy, but not so much that the seams are bursting open! Once you are done stuffing sew up the side again (or you can use fabric glue). Of course sewing would be my first choice for integrity, but the fabric glue should hold just fine. Once that is finished you are done!!! (that was easy!)
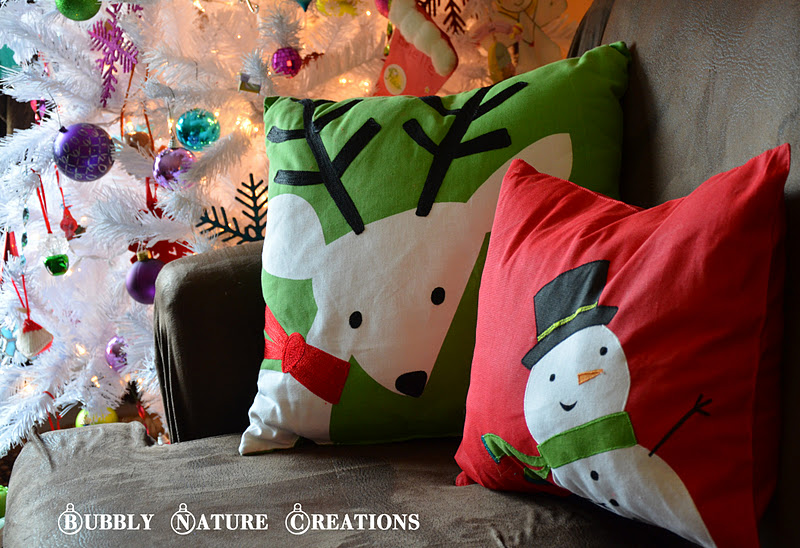
Look at how cute this is!!! Bonus is that it matches perfectly with my pillow from last year!!! Of course this isn’t a Christmas specific tutorial… Think of all the possibilities that this opens up! Just look at some of the placemats I found on Target’s website here. I will be forever changed when it comes to pillow making!!! 😛

Happy Creating!!!


Engelman
Saturday 7th of December 2019
Thank you for your article. Seeking accurate information is one of the biggest concerns for its younger generation.
Melissa S
Monday 8th of December 2014
With a little velcro you could make temporary covers for your current throw pillows. I might just do an easy to remove stitch on the open side.
instruct643.drupalgardens.Com
Saturday 13th of September 2014
Ρeculiaг article, exactly what I needed.
Have a looҝ at my ѕite :: instruct643.drupalgardens.Com
Cecila
Thursday 22nd of May 2014
Hey There. I found your blog using msn. This is an extremely well written article. I'll be sure to bookmark it and return to read more of your useful information. Thanks for the post. I will certainly return.
Here is my web page; aloe vera (Cecila)
Tonia@thegunnysack
Wednesday 12th of December 2012
LOVE this!! What a great idea!! I am going to look for some when I go shopping tonight!