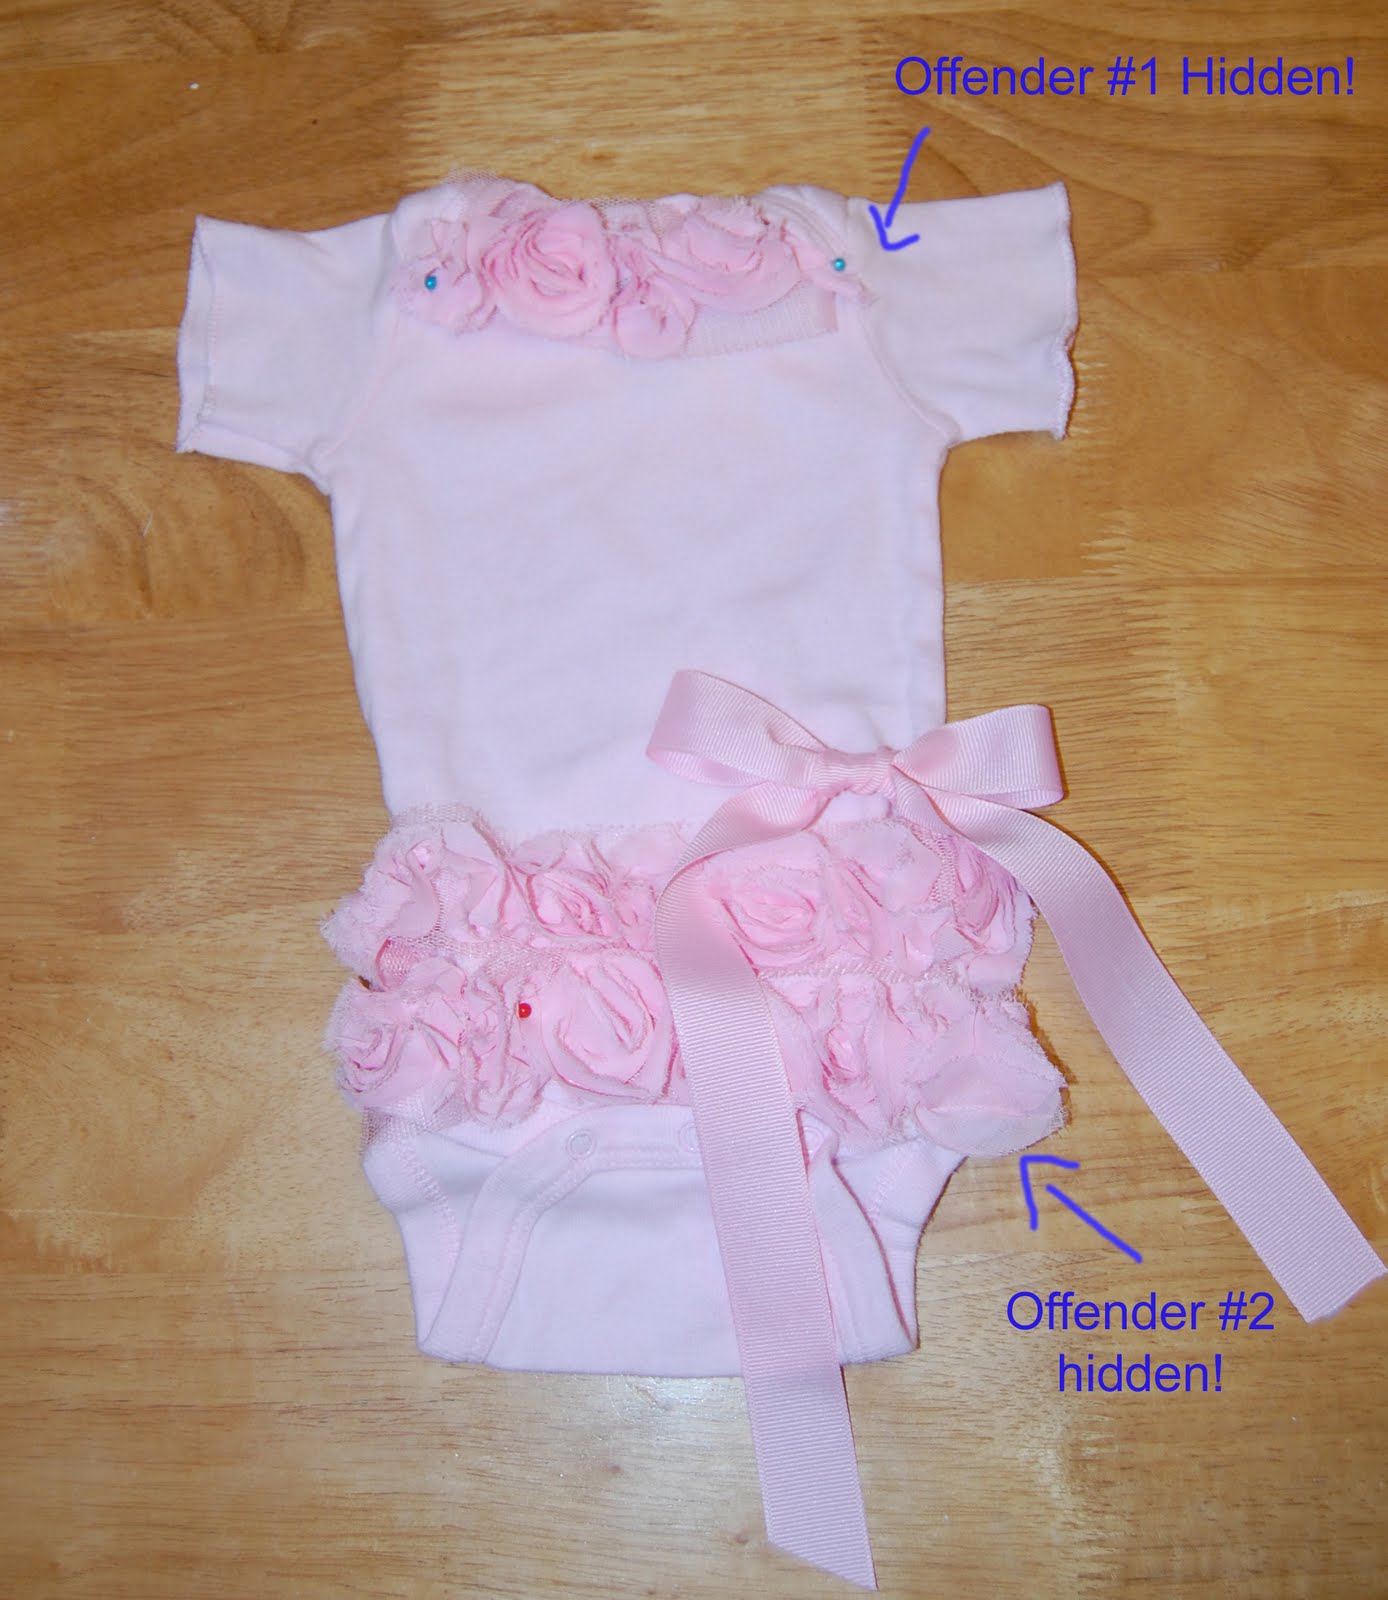
Don’t throw that stained onesie away! There are many things you can do to cover up common “offenders” of onesies. Old spit up stains, poopie “blow out” diaper stains (you mom’s know what I mean by this!) and the many other things that little ones can do to a common onesie! This particular onesie had little stains at the top and at the bottom… I didn’t have a reason to get rid of it since I use the stained ones anyway, but I wanted to see if I could fix this one up a bit more since it had been through 2 other girls and is about to go through 3! Here is what I came up with, and I am sure that you all have some great ideas too… so if you have a link to a onesie “redo” please hook me up!
Supplies for the “ballerina” onesie
Old Onesie (Mine was newborn size)- preferably stains that are in areas easy to cover up!
ruffles or rosettes- found mine at Hobby Lobby- I used 1 yard which was “just enough” for the newborn size, so you will need more for a bigger size onesie (it was 5.99 a yard, but I used a 40% off coupon at Hobby Lobby- they do this promotion a lot!)
Grosgrain Ribbon 7/8 inch
Thin Grosgrain Ribbon (not sure the size, but any “thin” will do)
Needle/ Thread/ Sewing Machine
Time to get started!
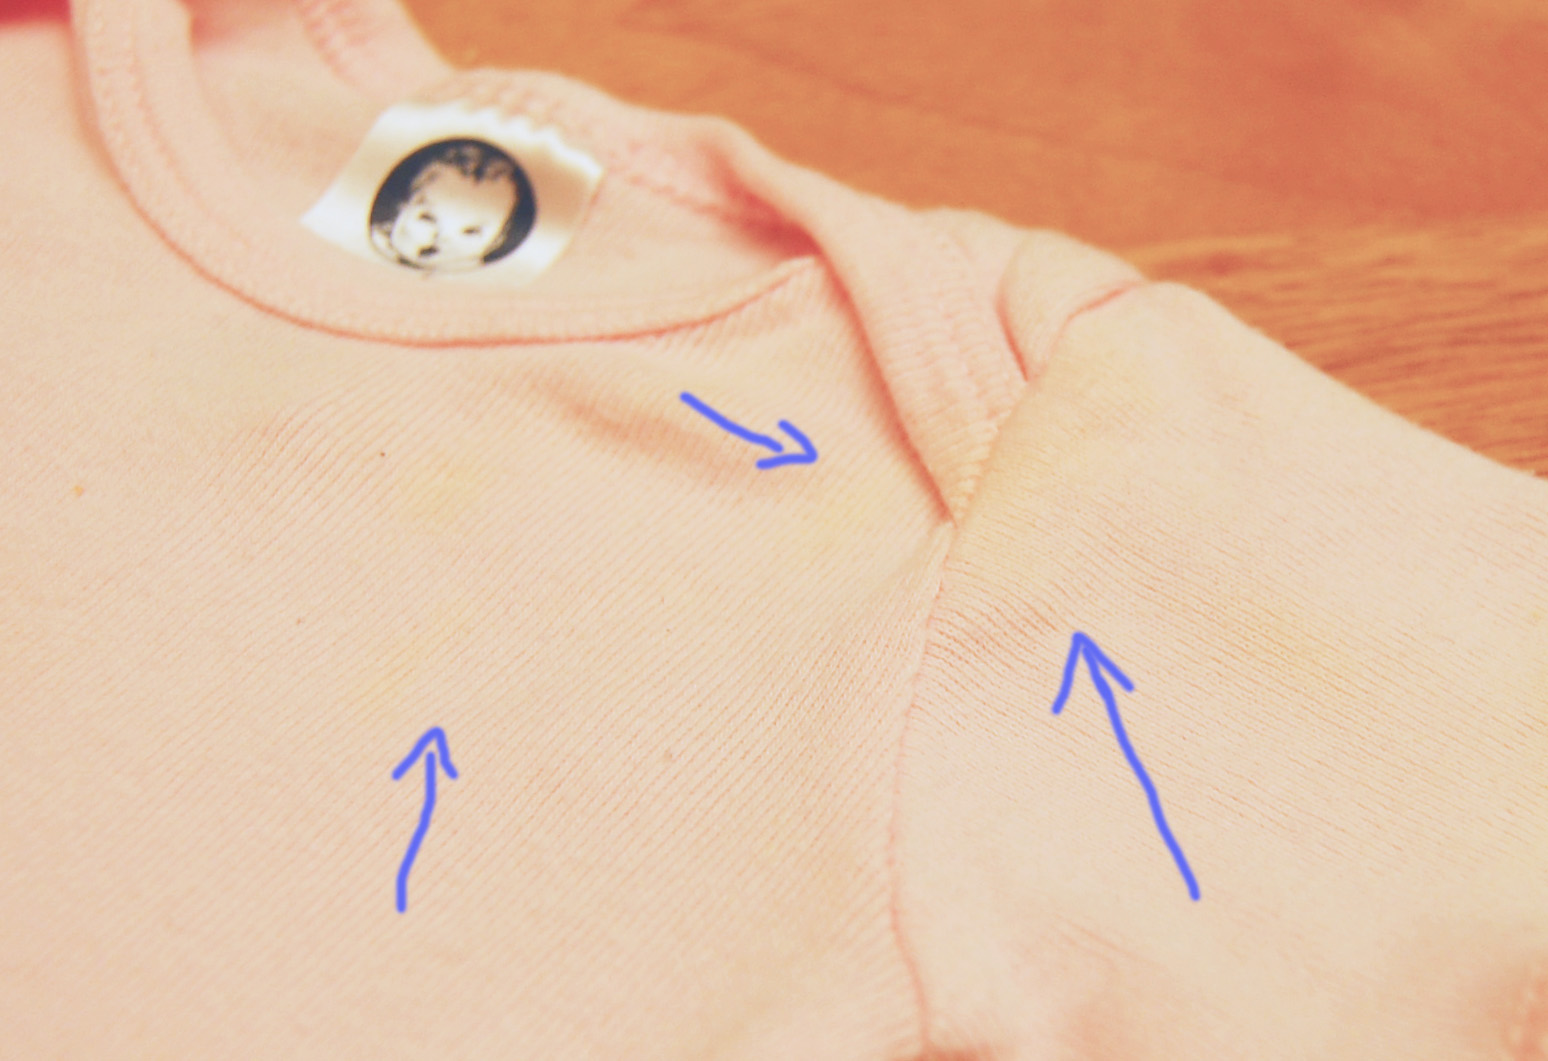
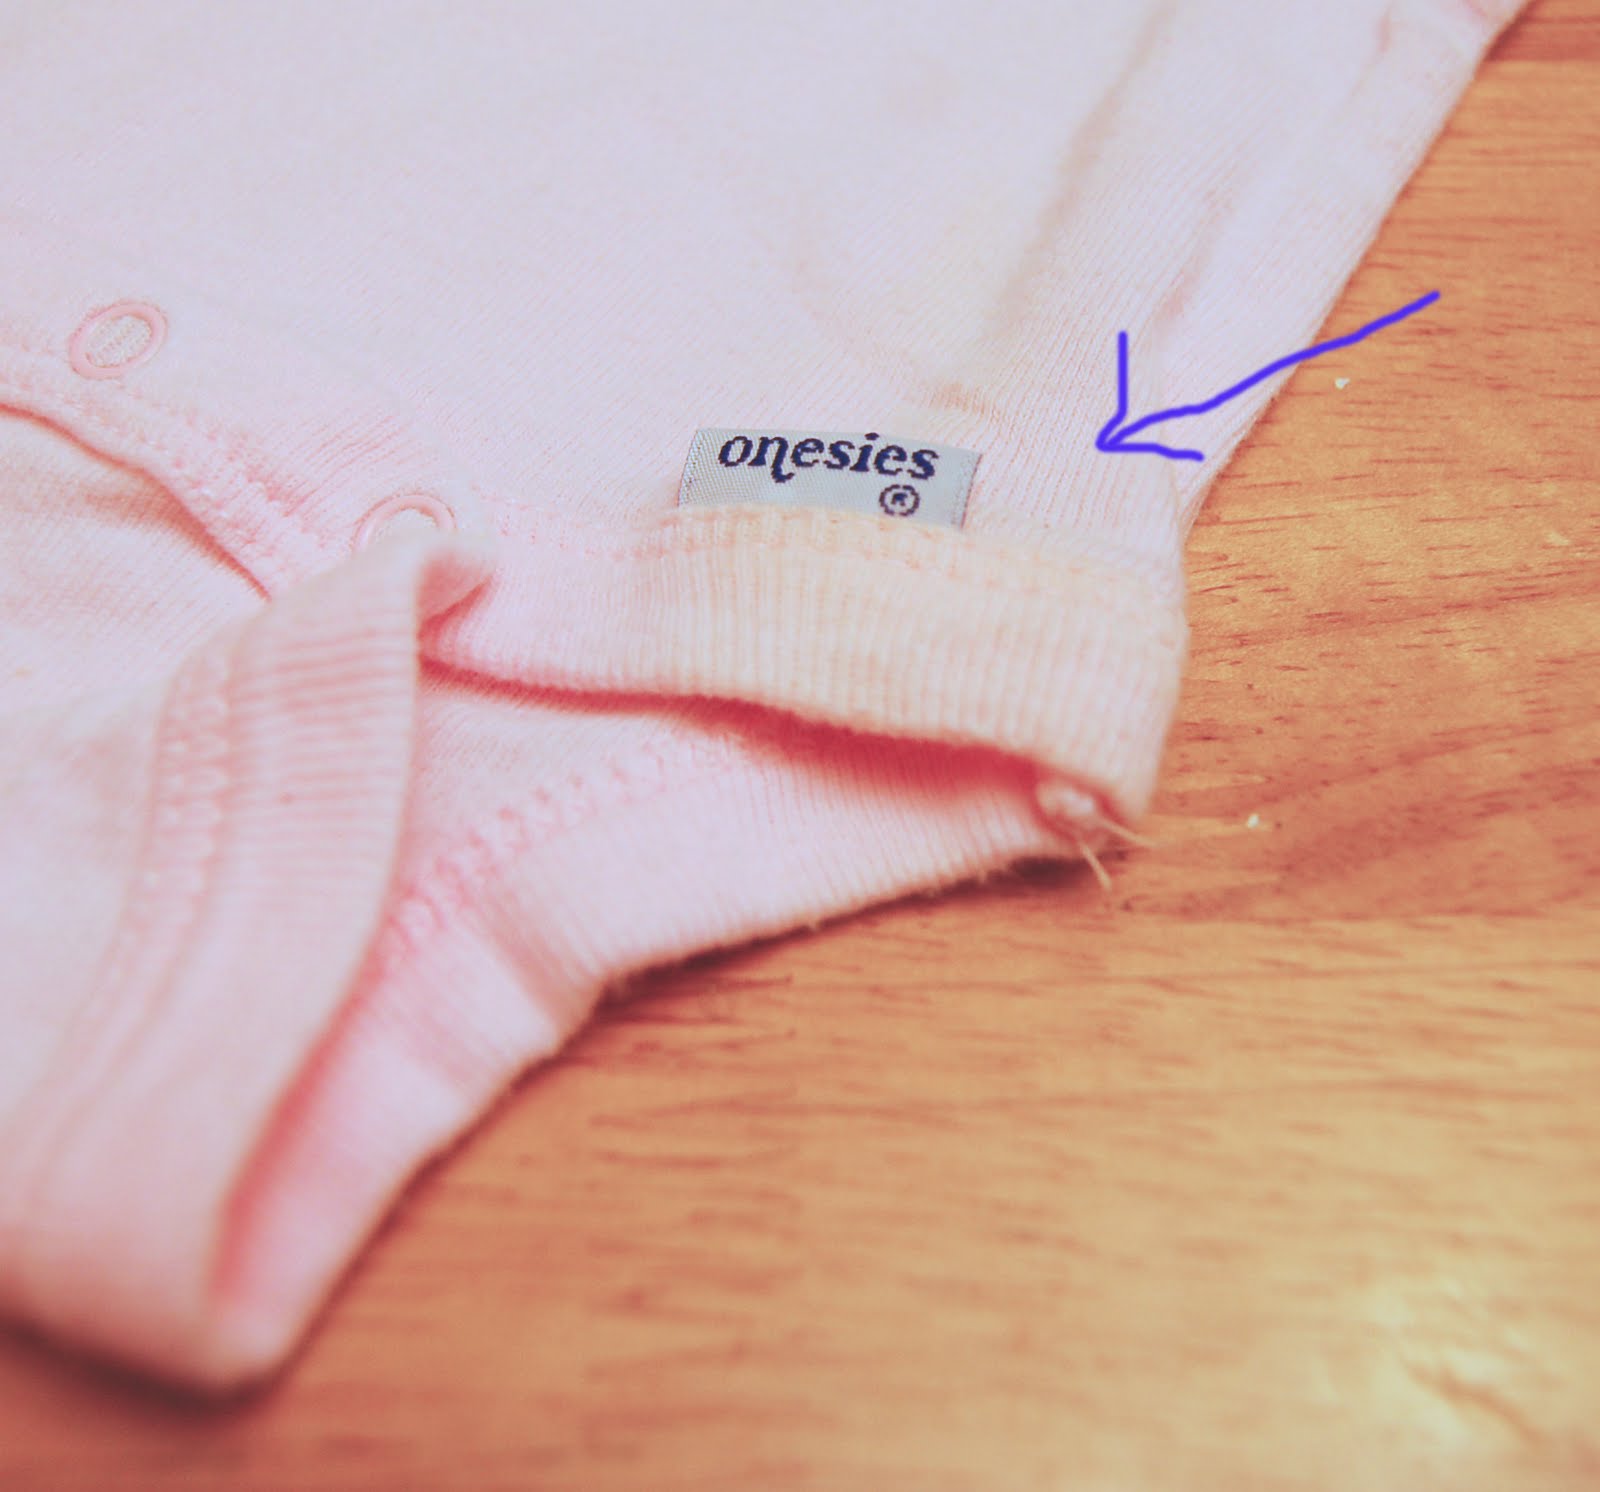
First asses your onesie.. make note of where the stains are!
I made sure that my ruffles covered everything up except on the sleeves which I was going to get rid of anyway.
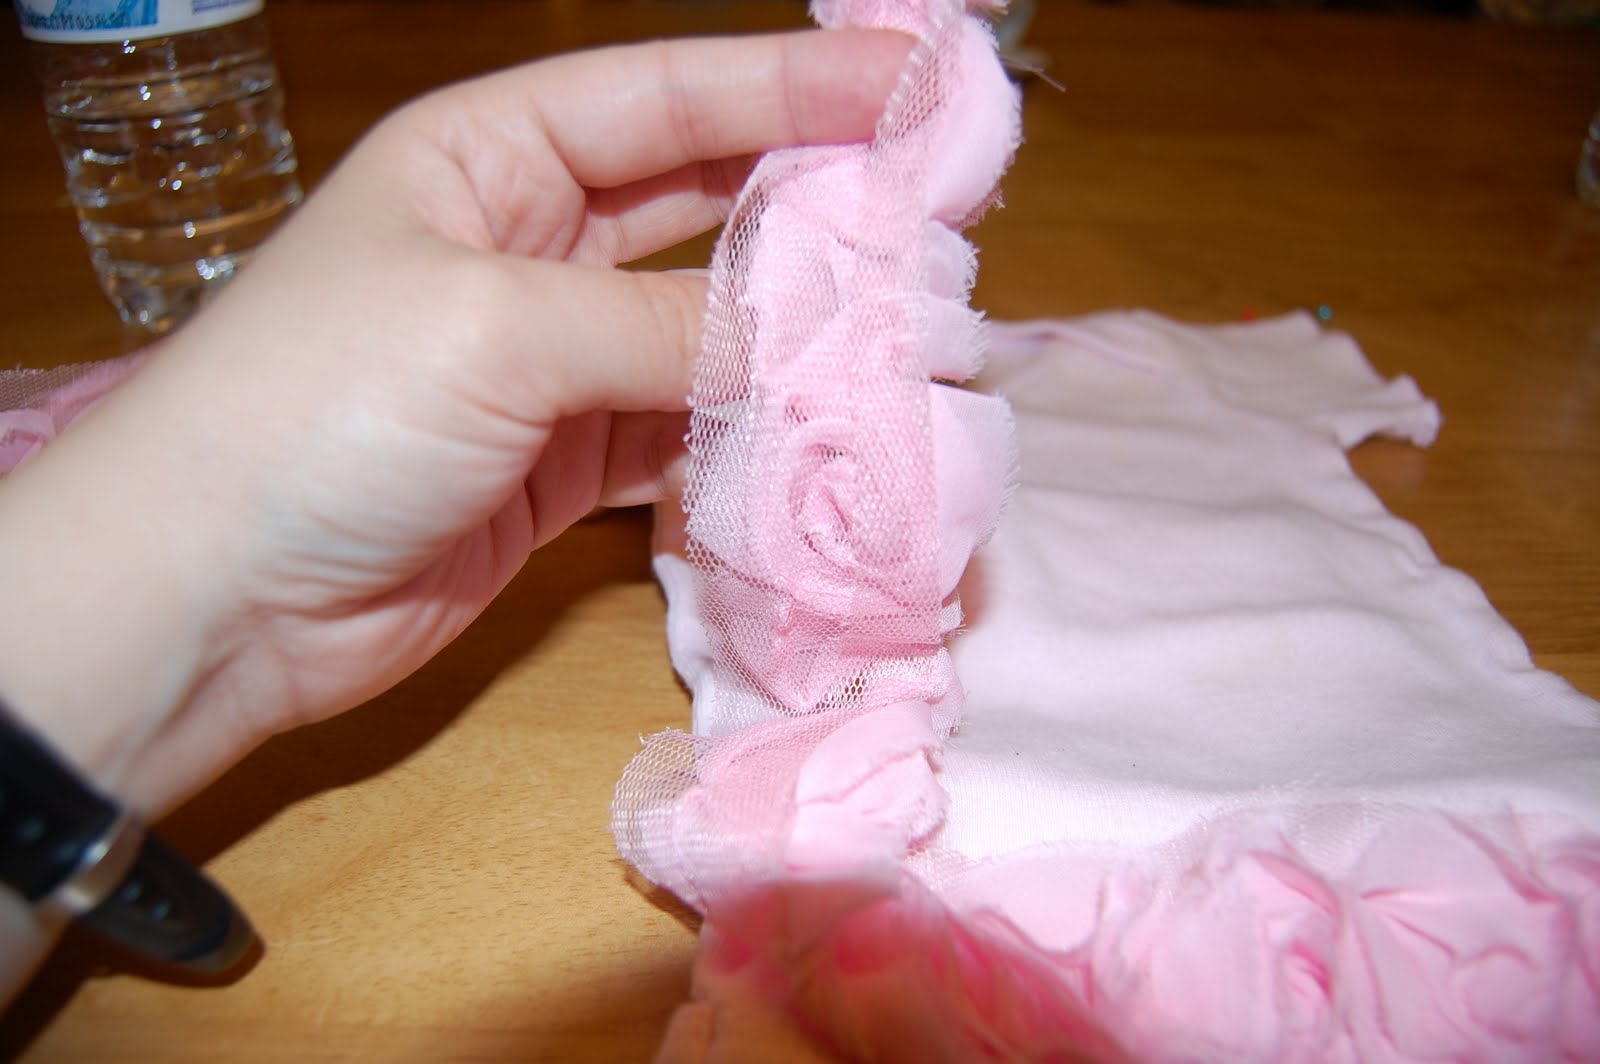
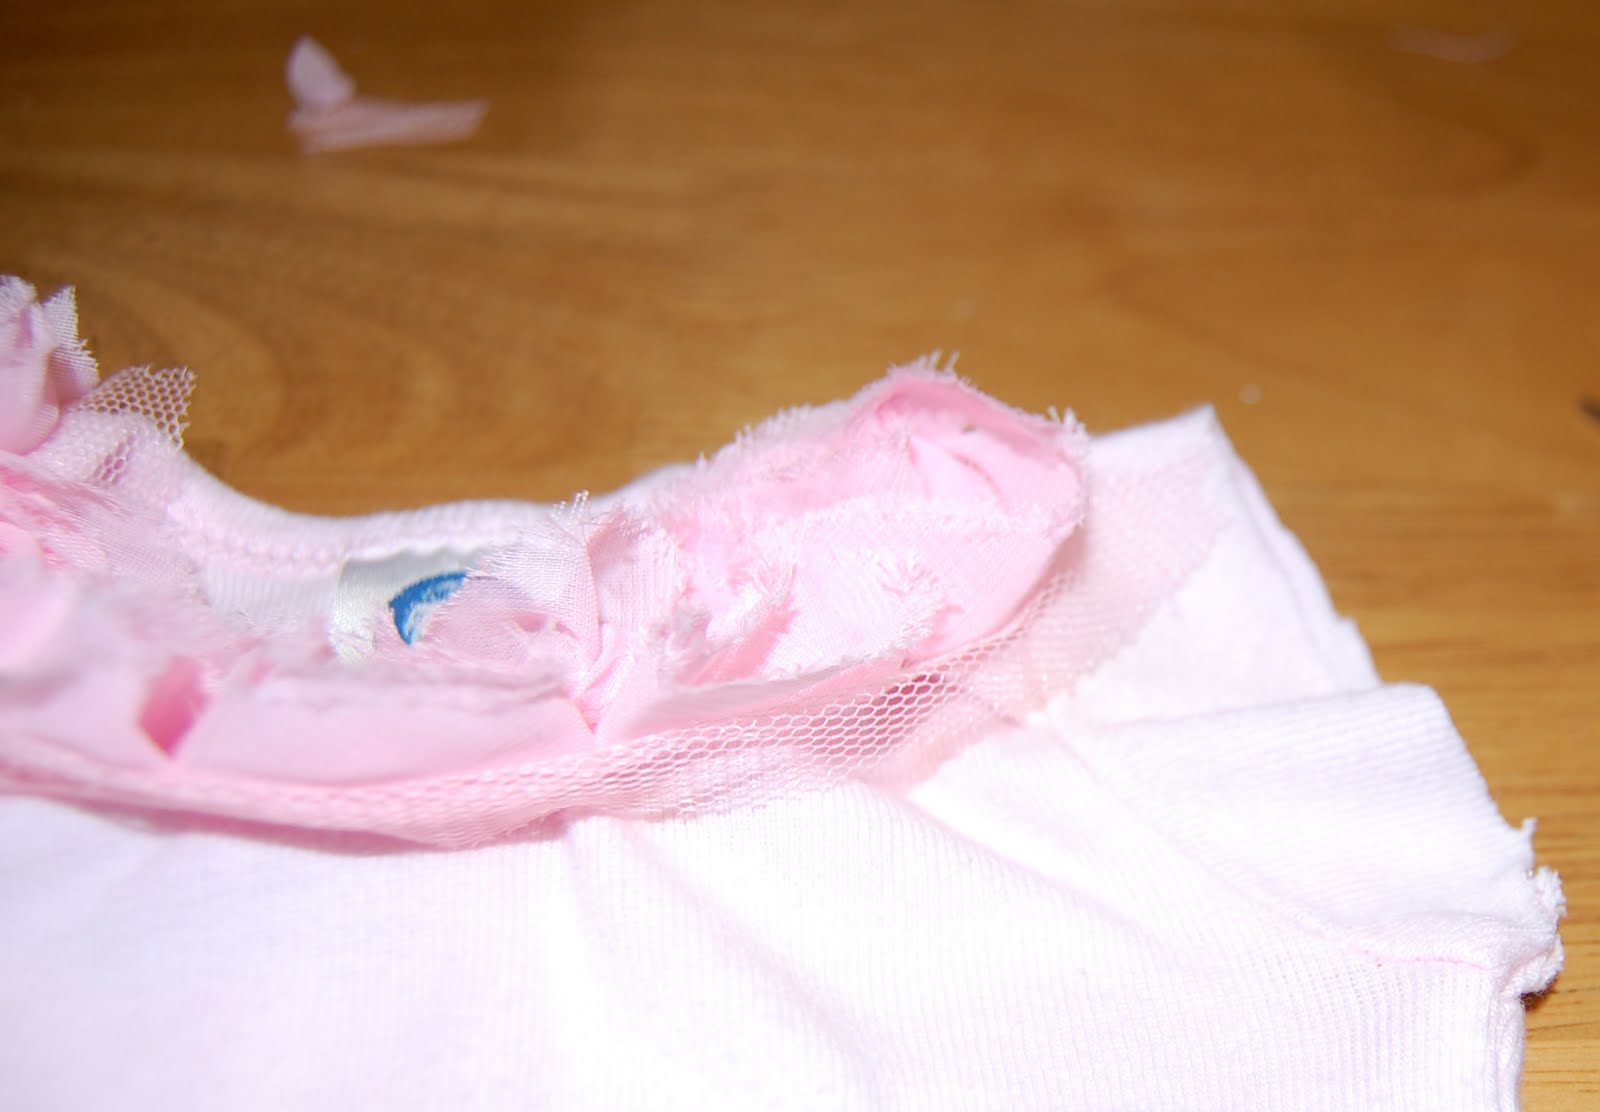
Now it’s time to start sewing! The Zig Zig stitch works best- because this will need to stretch! The pic below is what they looked like before adding them… notice that they are all placed on a tulle backing. Also I don’t have a picture of the grosgrain ribbon, but I just tied a long bow and attched it to the side of the onesie after putting on the rosettes. See that layer of tulle just under the rosettes??? That is where you will make your stitches. If you need to secure the rosettes even more then take a needle and thread and make an X through the middle of each rosette- individually. This ensures that the rosettes will still stretch with the rest of the onesie.
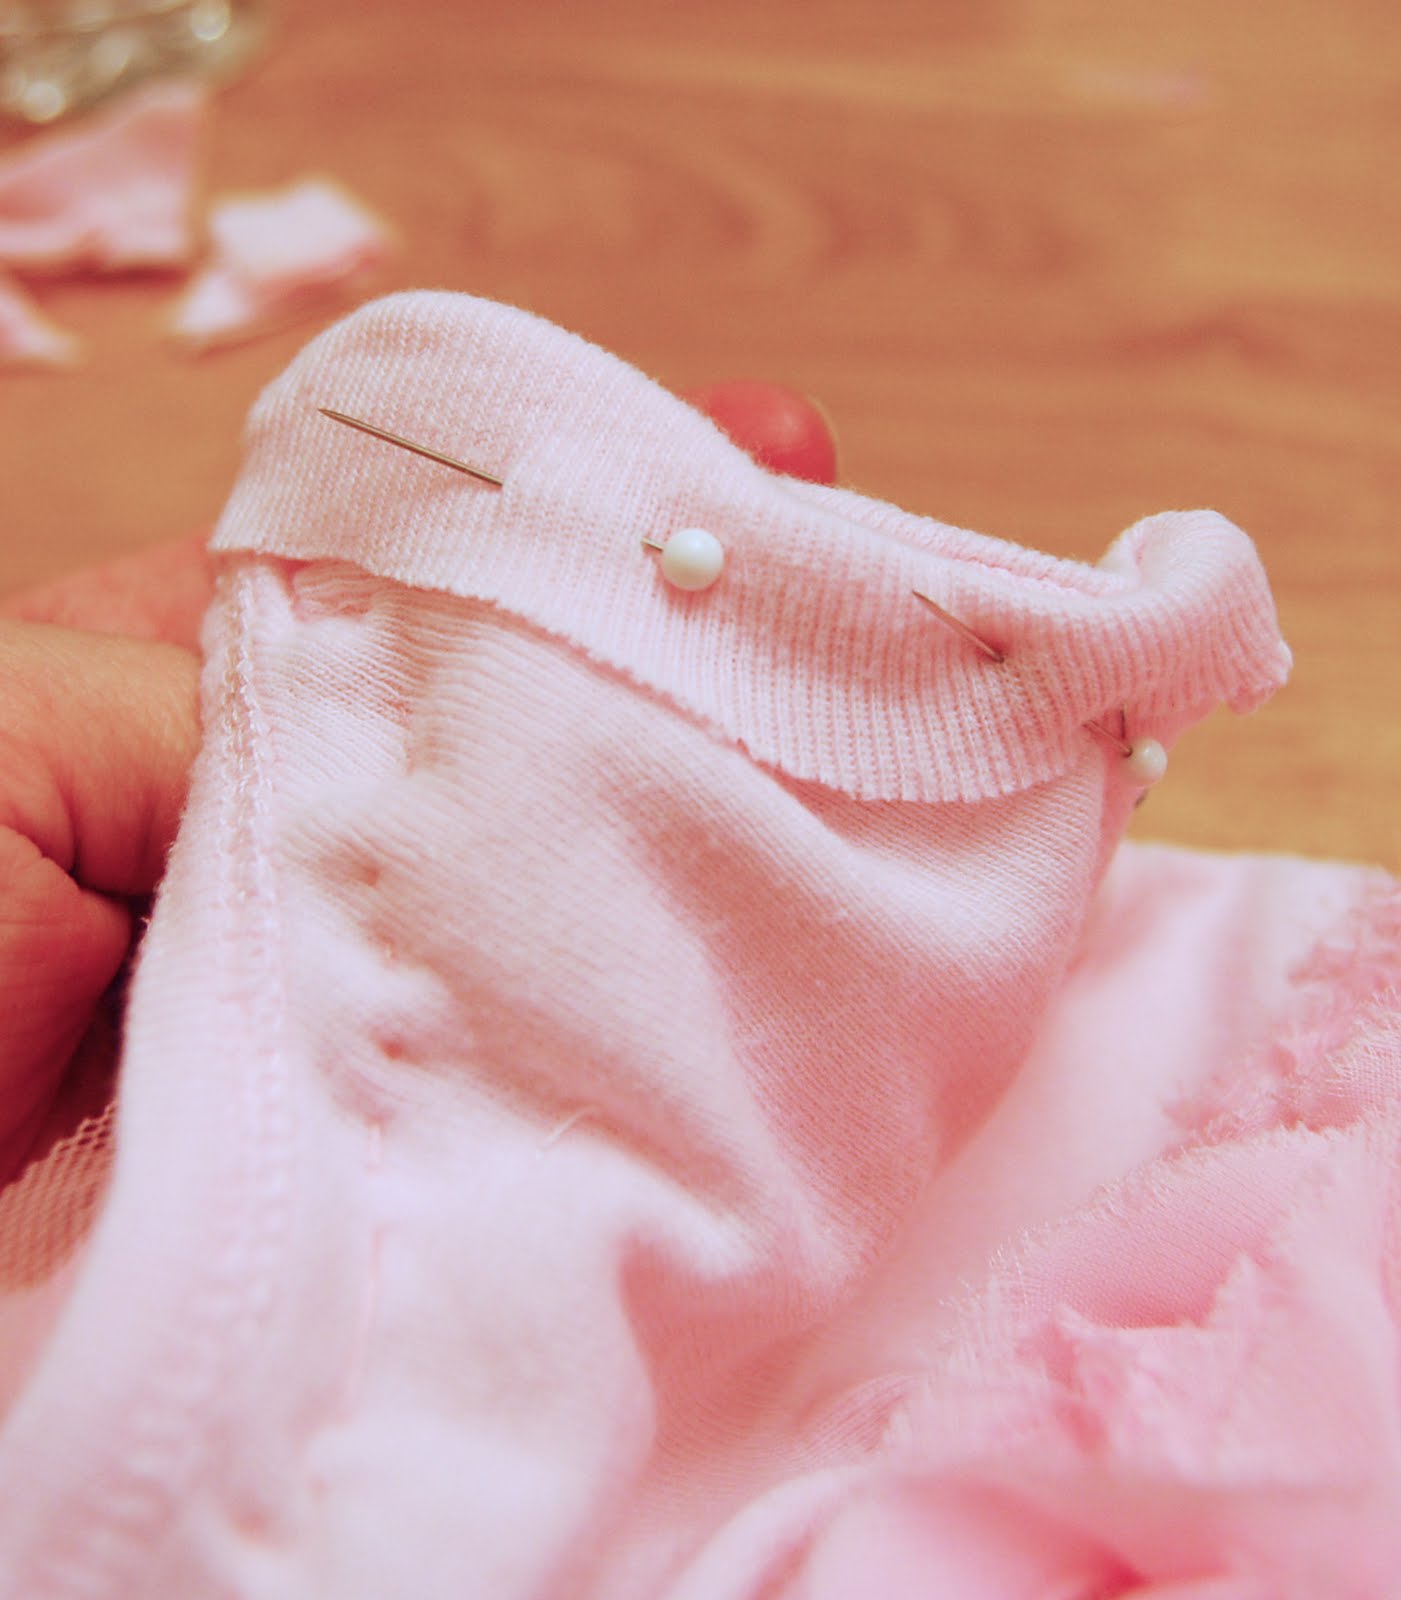
Hand stich the rosettes to the collar of the onesie. After that cut the sleeves off just enough so that there is enough material to make a double roll on the inside.
Turn the onesie inside out and roll the sleeves back. (notice that this pic is not a double roll!!!) I ended up using a double roll though- so make note! From there just sew around to secure the roll.
After sewing tie a ribbon tightly around the top of the sleeves with a bow. Be careful to allow enough room for the head to get through!
Now it is finished!!! You have a beautiful outfit out of an old onesie! Also notice the headband that I made with the leftover scraps and some pantyhose… maybe the tutorial for that will be next! 🙂
Happy Creating!
Pin It
Read more...
Sharing is caring!


Cindy Felice
Friday 7th of August 2015
Thank you so much!! I needed a shower gift for a newborn girl this Saturday. I feel so blessed!!! Thanks again for sharing!!
Mary Simmons
Sunday 2nd of June 2013
Did you sew the rosette trim around the back of the onesie as well, or just on the front?
Pins of the Week: 10 DIY Onesies | My Family Blog
Sunday 9th of September 2012
[...] give your onesie a new life. I am sure your ballerina princess will just love it too! Source via Bubbly Nature Creations Pinned by Bubbly Nature [...]
101 Tutoriale cadouri pentru copii « ilikehandmade
Friday 20th of April 2012
[...] Ballerina Onesie – Bubbly Nature Creations [...]
Candie
Tuesday 3rd of April 2012
LOVE LOVE LOVE! Now I just have to actually find a baby to actually make this for! haha! You should totally enter this project in Craftbaby's 'Upcycle Challenge'! http://www.craftbaby.com/contests/3/upcycle-it-sweeps